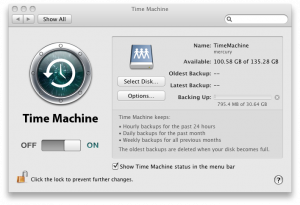
There are a number of affordable NAS solutions out there that can provide relatively inexpensive network addressable storage over NFS and SMB. Using a Mac with TimeMachine, an NFS server can be configured to provide storage for all of your backups. This article will walk you through setting this up, with the assumption that you already have the NFS storage device available on your network.
The first thing you need to do is enable networked storage volumes for TimeMachine. This can be done at a command prompt with the following:
defaults write com.apple.systempreferences TMShowUnsupportedNetworkVolumes 1
The first thing you need to do is enable networked storage volumes for TimeMachineOnce networked devices are enabled, you will need a filesystem on your NFS share that your TimeMachine archive tool can write to. Rather than backup directly to a remote filesystem, a virtual filesystem is used that has been formatted to HFS+ specifications. To create this, enter the following:
hdiutil create -size 128g -type SPARSEBUNDLE -nospotlight -volname "Time Machine Backup" -fs "Case-sensitive Journaled HFS+" -verbose ./mybackup.sparsebundle
The sparsebundle must be created locally on your Mac for the first time, it will not write correctly to a remote filesystem over NFS. After the bundle is ready, from a command prompt open the mybackup.sparsebundle directory and create a file called com.apple.TimeMachine.MachineID.plist. The file should include the following:
<?xml version="1.0" encoding="UTF-8"?>
<!DOCTYPE plist
  PUBLIC "-//Apple//DTD PLIST 1.0//EN"
  "http://www.apple.com/DTDs/PropertyList-1.0.dtd">
<plist version="1.0">
<dict>
<key>com.apple.backupd.HostUUID</key>
<string>[YOUR_HOST_UUID_VALUE]</string>
</dict>
</plist>
 To find your HostUUID, open System Profiler and on the Hardware Overview screen find the value labeled “Hardware UUID”. remember not to double click on the sparse bundle from the Finder, since this will mount the image and won’t let you create the plist file with your host UUID.
After getting this file into place, open the TimeMachine settings and point it to your NFS share. Before allowing the first backup to start, you may want to unmount the NFS share from your desktop. TimeMachine will take care of auto-mounting when it’s ready to run the backup, and when your computer is out of the office it will gently remind you that the backups have been trying to run without success.


4 Comments
forrie · October 6, 2010 at 3:27 pm
Regarding the arg to hdiutil “-size 128g”, is this a fixed size or is it dynamic (ie: to determine the correct amount of space to use for Time Machine’s backup).
Eric · October 7, 2010 at 7:59 am
It’s a fixed size, but it won’t actually consume all of that space when created. So, in this case, 128GB is the largest size of the sparsebundle but if your initial backup is 40GB then that’s all the space you will consume.
These can be resized as well using the hdiutil package, so if you start with 128GB and need more later it’s possible.
forrie · January 27, 2012 at 4:59 pm
How do we determine the fair initial size of the sparsebundle? For example, my current HD config consumes:
/dev/disk0s2 232Gi 154Gi 78Gi 67% /
/dev/disk1s2 931Gi 39Gi 892Gi 5% /Volumes/Macintosh HD 2
I don’t think 128gb would be sufficient…?
Thank you :-)
Eric · January 28, 2012 at 10:48 pm
You will definitely need more than 128GB for your backup, I would estimate 250GB as a starting point. However, it really depends what your plans are for the larger drive – if you do end up using much of that then you’ll need significantly more space.
I would just allocate 1TB to your sparse bundle and make sure it doesn’t outgrow the physical storage space.
Comments are closed.